
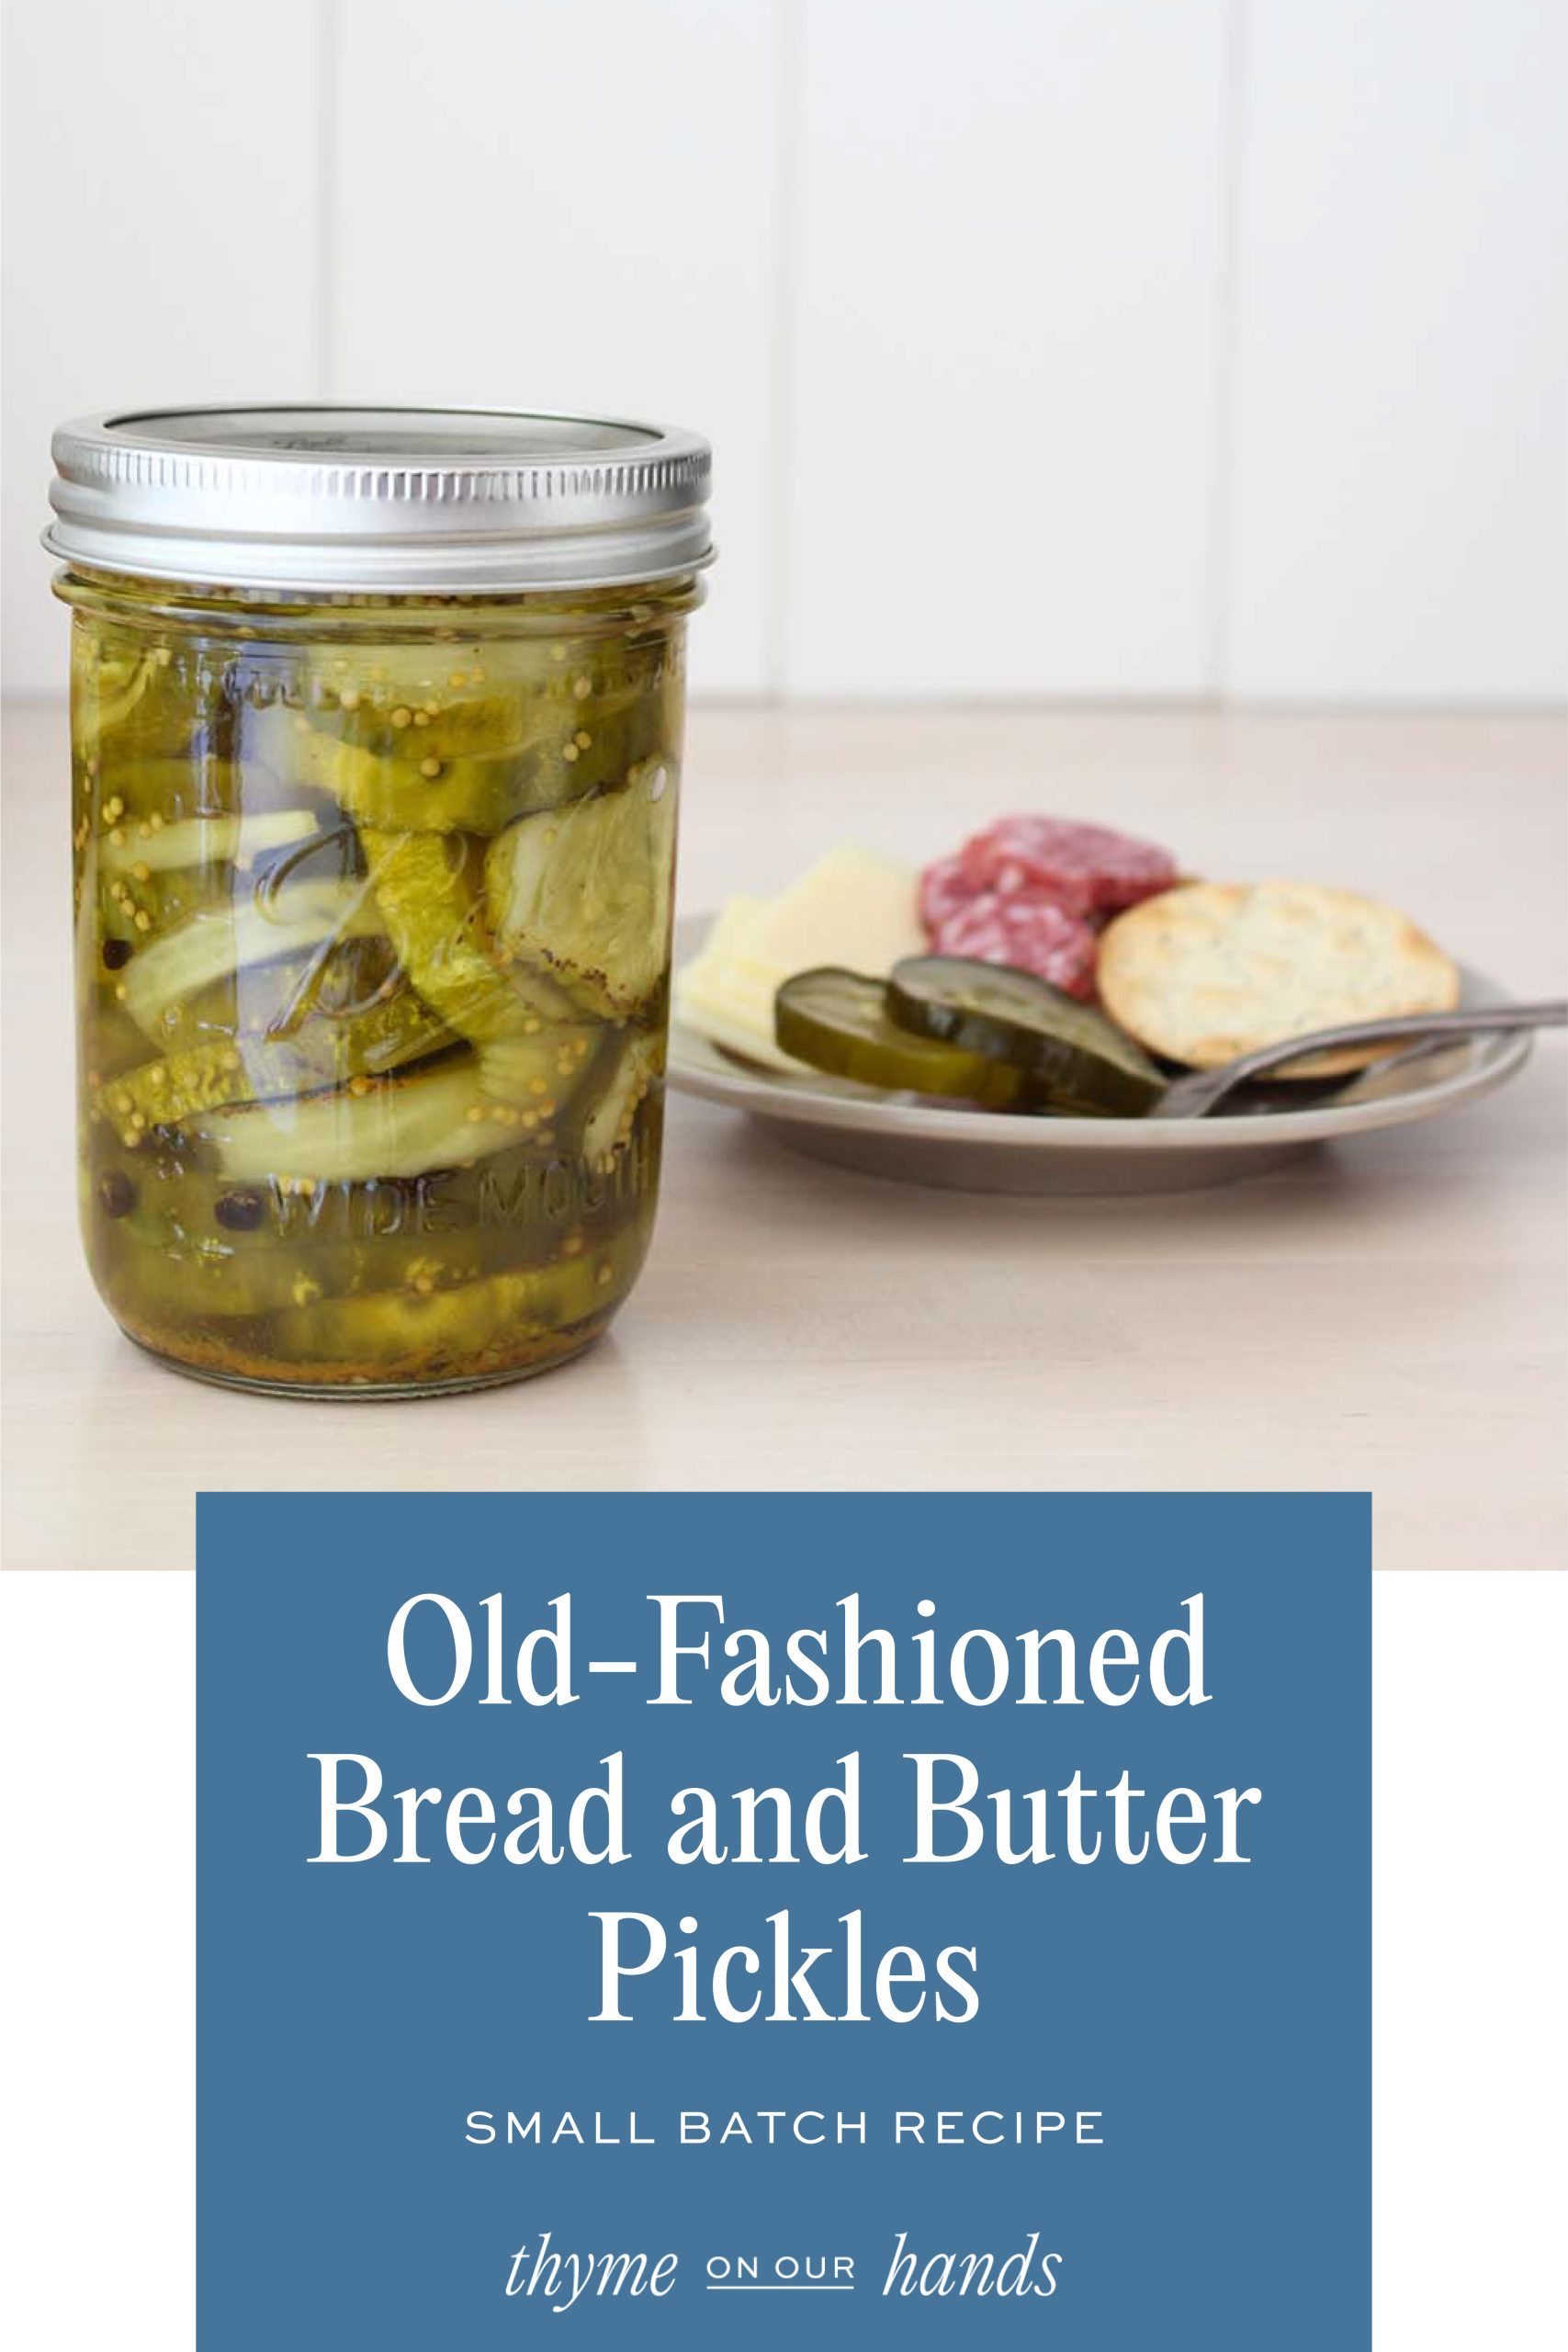
Old-Fashioned Bread and Butter Pickles: Simple Small-Batch Canning Recipe


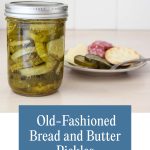
Every pantry should have a few jars of these sweet bread and butter pickles, the perfect complement to burgers, sandwiches, or charcuterie boards. This small-batch canning recipe requires just 2½ pounds of cucumbers — great for putting up garden-fresh cucumbers while they’re still crisp.

We started our first raised bed vegetable garden in 2020. That Spring, we nestled six cucumber starts into the soil, hoping for the best. By the end of July, we learned how prolific those little plants can be — we were absolutely buried in cucumbers. After eating all the refrigerator pickles we could, it was time to find an easy canning recipe that would allow us to eat pickles all winter long.
After testing a few recipes, I finally landed on the bread and butter pickle recipe that was perfectly sweet and tangy. Now, I don’t even bother with refrigerator pickles — I can almost every single cucumber that comes out of the garden.
We still plant six cucumber plants a year, and those cucumber plants typically produce in “gluts”. In other words, within 48 hours, all of the cucumbers ripen, and I suddenly have a big pile of cucumbers. This small-batch canning recipe requires just 2½ pounds of cucumbers — which is just about how many cucumbers I harvest during those gluts. That said, this recipe can be easily doubled or tripled if you have more cucumbers!
Tips for getting crisp bread and butter pickles
Everyone loves crisp pickles — and everyone has advice for stopping canned pickles from turning to mush. I’ve seen others recommend adding oak leaves, grape leaves, tea leaves, or even calcium chloride to your pickles, but that’s too fussy for me. I credit my crisp pickles to picking the cucumbers at the right time, canning them ASAP, and the Fresh Pack Method.
Pick your cucumbers at the right time
Pick them small, and pick them in the morning. Always pick your cucumbers (and other garden produce) in the morning, preferably before 10 am. The cucumbers are firmer and sweeter than cucumbers picked after spending all day cooking in the hot sun. If you’re getting cucumbers from the farmer’s market, ensure they are firm and placed in the shade.
Process them as soon as possible
Another key thing to crisp pickles is to process them ASAP. I’d advise a maximum of 48 hours between picking them and packing them in jars. Often, this means you’ll have to make time rather than wait for the best time. I promise, a few extra hours now will be worth it in the winter, when you’re munching on deliciously crisp pickles. I always keep my cucumbers in the crisper drawer of my fridge while I wait on my harvest to come in over those two days.
Try the Fresh Pack Method
Fresh-pack describes a method of pickling in which raw vegetables are packed into jars and covered with a hot pickling liquid. These filled jars are then processed in a water bath canner. This is opposite to hot-packed pickles, in which the raw vegetables are first boiled in the pickling liquid before filling and processing the jars.
In my opinion, the fresh-pack method is the key to getting crisp pickles. Honestly, I’m not quick enough for the hot-pack method. As soon as the cucumbers are finished boiling for the recommended time, I start filling the jars — but not before the last few jars of cucumbers left in the hot pickling liquid are wayyy overcooked. The fresh-pack method reduces the amount of time the cucumbers spend boiling in the pickling liquid, preventing overcooking and resulting in a crisper pickle.
How to make bread and butter pickles
These old-fashioned bread and butter pickles are among the first things I ever canned. The process is beginner-friendly and mostly hands-off. This recipe can be easily doubled or tripled if you have a lot of cucumbers.
Ingredients needed:
- Canning salt
- Fresh pickling cucumbers
- Onion
- White vinegar (5% acidity)
- Apple cider vinegar
- Mustard seed
- Celery seed
- Allspice berries
- Turmeric powder
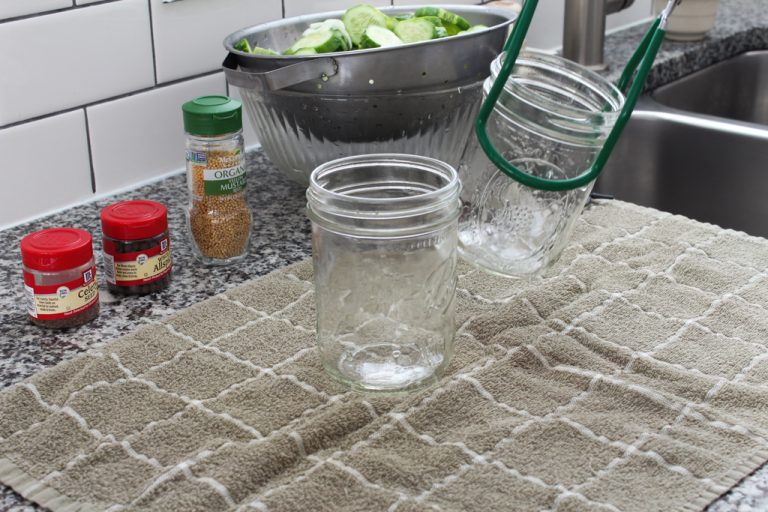
Tools you’ll need:
- 4 pint jars: I like to use wide-mouth pint canning jars for almost all of my canning. I purchase them at a local discount grocery store and try to stock up in the winter when they don’t cost an arm and a leg!
- 4 corresponding jar bands and new lids: You won’t need these if you’re using new jars.
- Large bowl
- Clean tea towels
- Water bath canner: I actually use a very large stock pot for my canning, although you can purchase a canner online. The canners I’ve seen typically come with a rack.
- Canning rack: Protects the jars from direct contact with the bottom of the canner or stock pot. I have one that was part of a canning toolkit.
- Jar lifter: Used to move the jars in and out of the canner. Came with my canning toolkit.
- Strainer or colander
- Medium stockpot
- Bubble popper: This handy tool helps to remove bubbles from your jars and has a handy headspace gauge on one side. Mine came in my canning toolkit.
- Clean dishcloth or rag
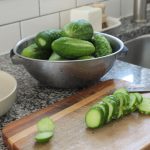
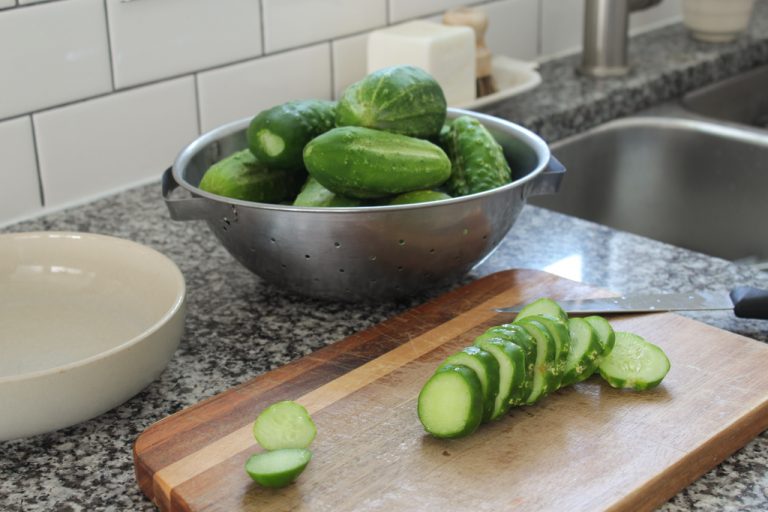
Step 1: Prep the cucumbers and onions
Start by rinsing your fresh cucumbers under cold running water and allowing them to drain. Then, prep the cucumbers by removing the ends of each cucumber and cutting it into ¼ inch slices. I save the scraps for my backyard chickens!
Next, cut the onion into thin slices. Then, mix the cucumbers and onions in a large bowl.
 Remove the ends of the cucumbers
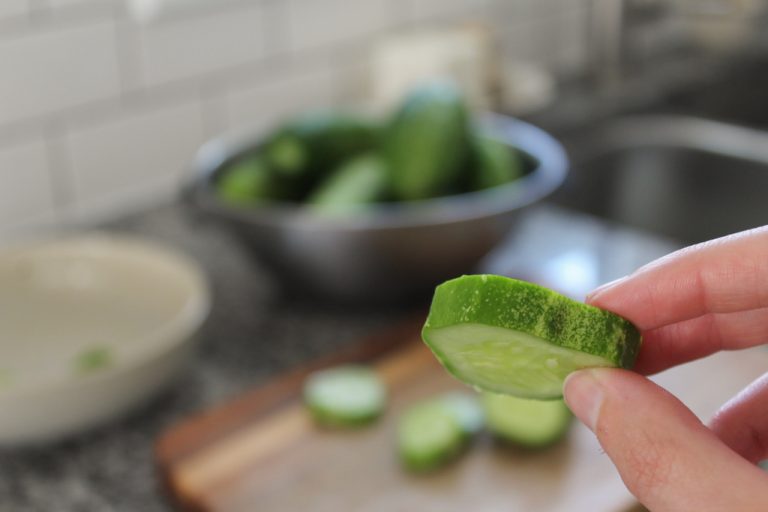 Cut the cucumbers into 1/4-inch slices
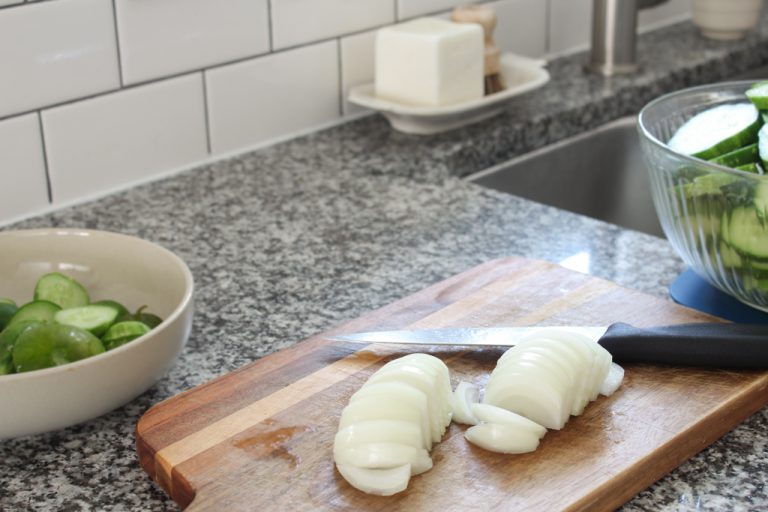 Slice the onion into thin slices
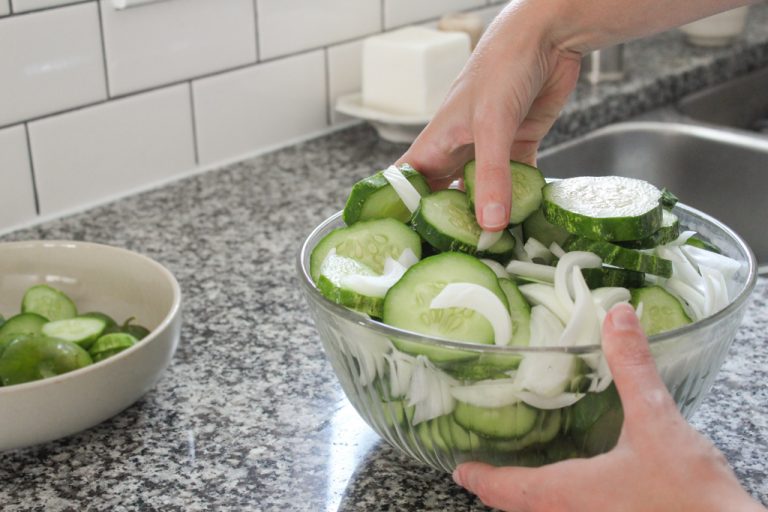 Mix the onion and cucumber in a large bowl
Now, sprinkle the canning salt over the cucumber mixture and cover the bowl with a clean tea towel. Scatter ice cubes over the tea towel.
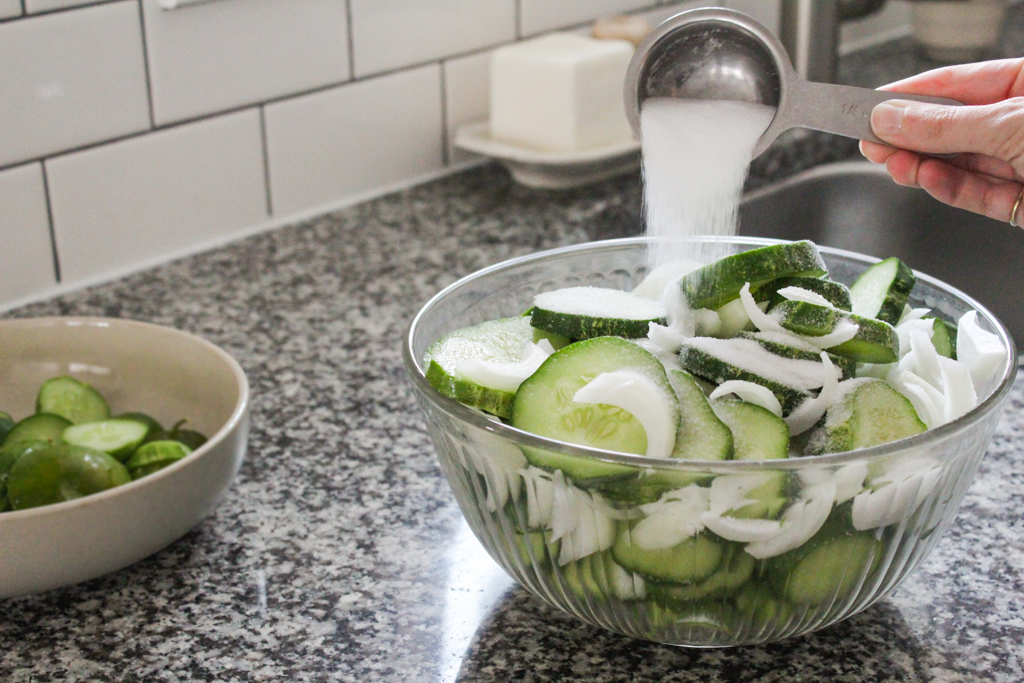 Sprinkle salt over the cucumber mixture
 Scatter ice over the tea towel
Set the cucumbers and onions out for 2 hours and 30 minutes. You can place them in the fridge if you like, but I tend to leave them on the counter. Either way, I like to arrange the towel so the ice melt doesn’t drip all over.
Step 2: Pre-heat the jars
About 30 minutes before the cucumbers are ready, start pre-heating your jars. If you’re using new jars, remove the bands and lids and wash all parts with hot, soapy water. Then, place the jars on the rack of your water bath canner. If you’re reusing jars, inspect them for damage before washing and placing them in the canner. Be sure to set out new lids for your jars!
Fill the canner with water, filling and covering the jars by 2 inches. Bring the water canner to a simmer, 180℉, and simmer the jars for 10 minutes. Then, allow the jars to simmer until needed for filling. This pre-heating method prevents your jars from cracking.
Step 3: Assemble your ingredients and fill the jars
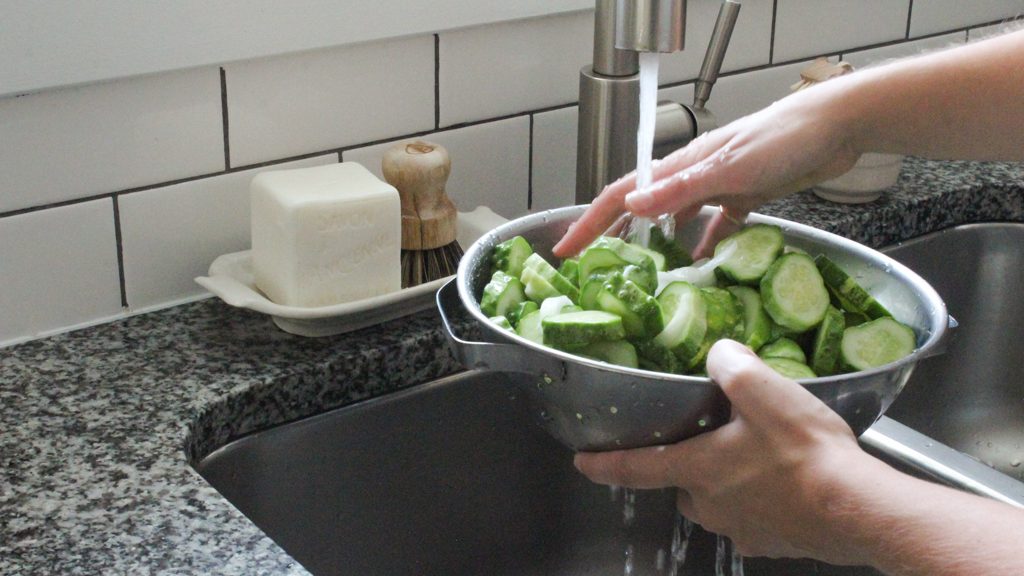
After the 2½ hours have passed, pour the cucumbers and onions into a strainer and rinse them under cold running water to remove the salt. Allow the cucumber mixture to drain.
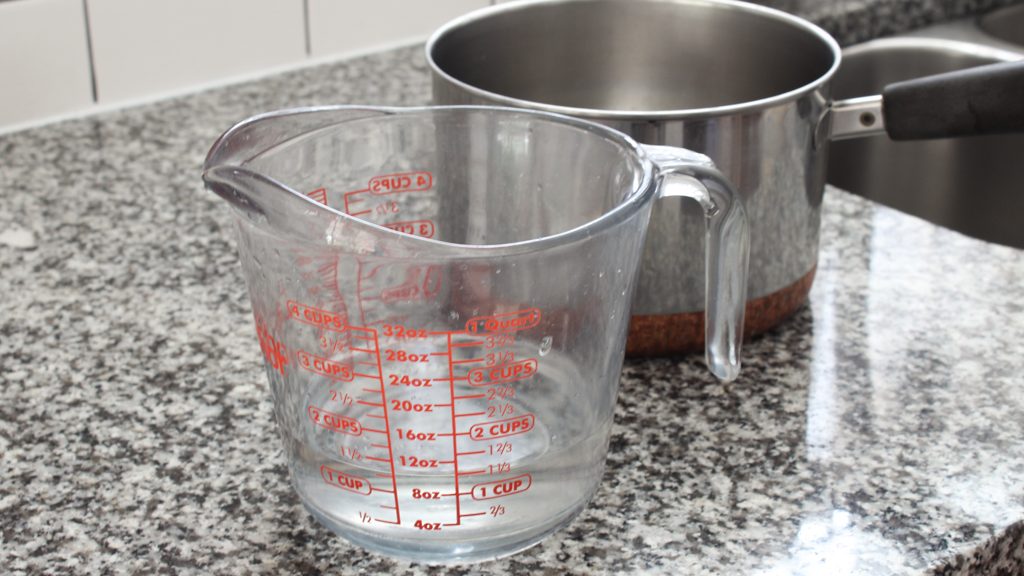
Meanwhile, combine the white vinegar, apple cider vinegar, and sugar in a stockpot. In this recipe, white vinegar gives a tartness to the pickling liquid, while the apple cider adds a sweet, lightly fruity flavor. Bring this mixture to a boil, stirring until the sugar dissolves.
While the pickling liquid comes to a boil, pull the jars from the canner using a jar lifter and place them on your tea towel.
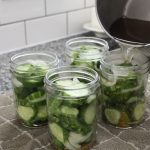
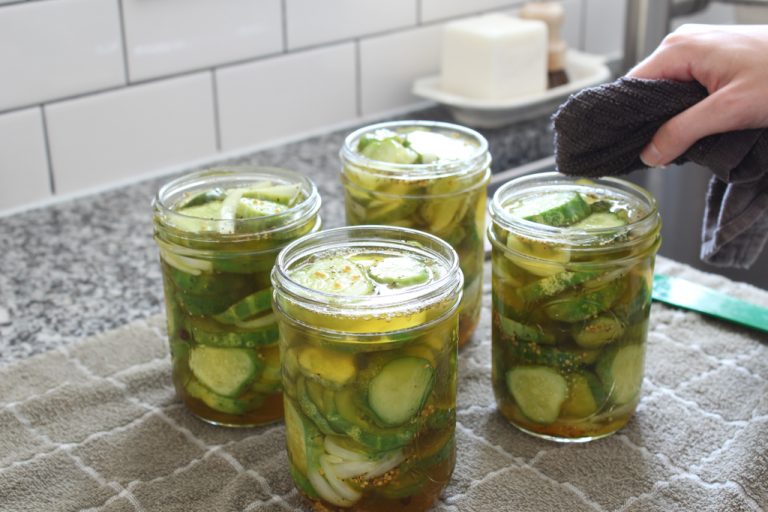
Fill the jars with spices, cucumbers, and pickling liquid
Working quickly, add 1 teaspoon mustard seed, ¼ teaspoon celery seed, ¼ teaspoon allspice berries, and ⅛ teaspoon turmeric powder to each jar. Then, pack the cucumbers and onions into the jars, leaving ½ inch headspace. Now, pour or ladle the hot pickling liquid over the packed jar. Be sure to leave ½ inch headspace.
 Pull the jars and lids from the water bath canner
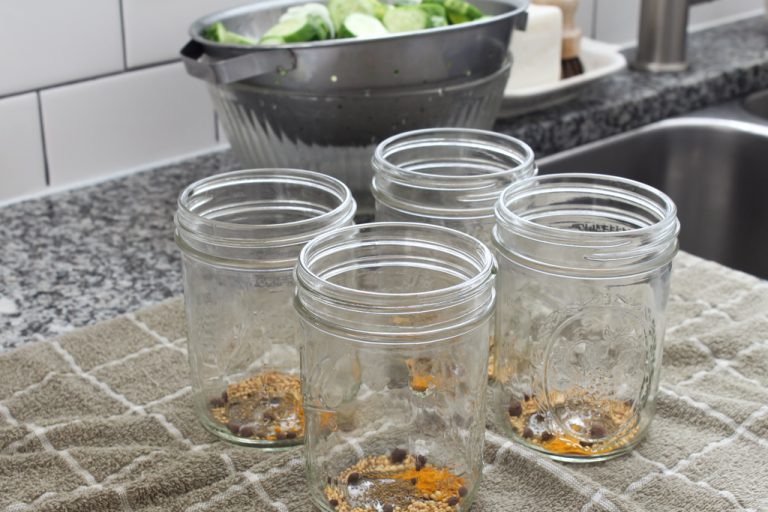 Fill the jars with the spices
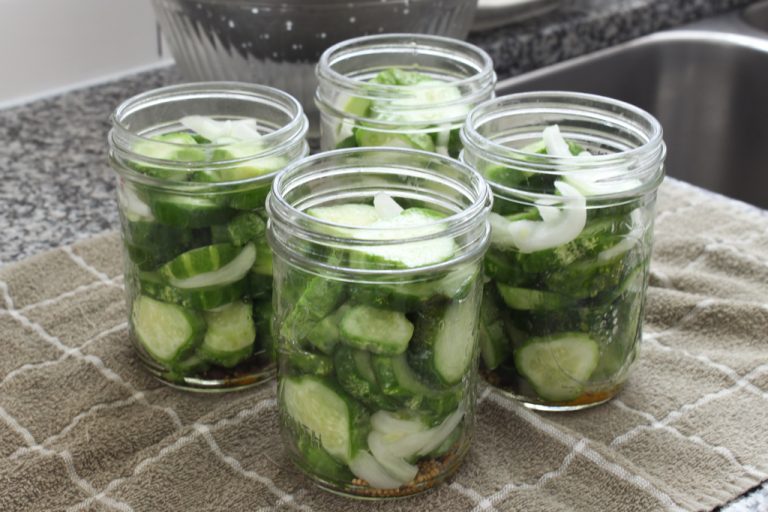 Pack the cucumber slices into the jars
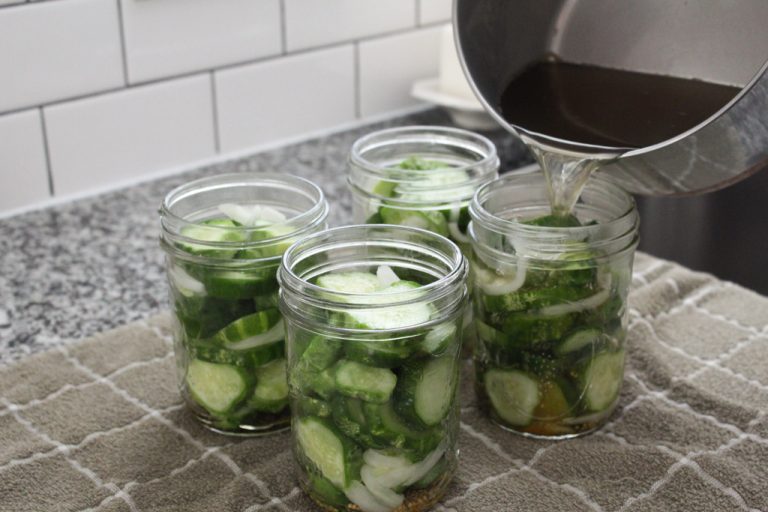 Pour the pickling liquid over the top of the cucumber slices, leaving a 1/2 inch headspace
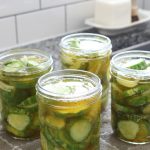
Next, wipe the jar rims with a clean, damp cloth and center clean, new lids on the jars. Then, screw on the bands to fingertip-tight.
 Wipe the rims of the jars
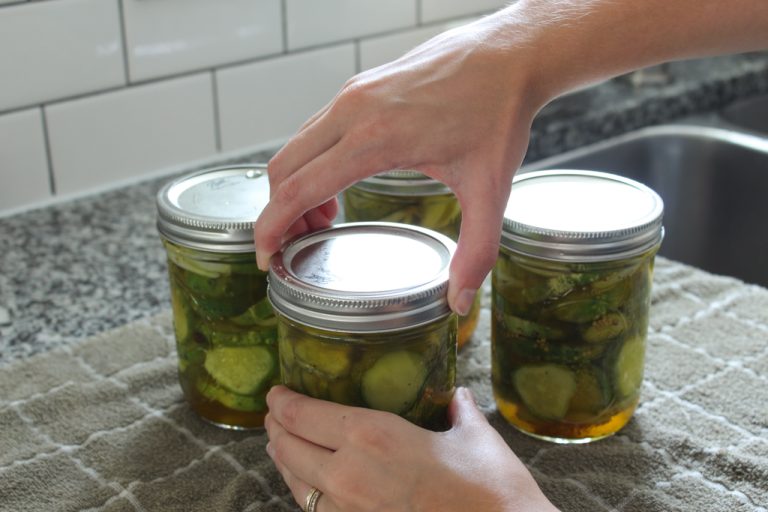 Tighten the bands to fingertip-tightness
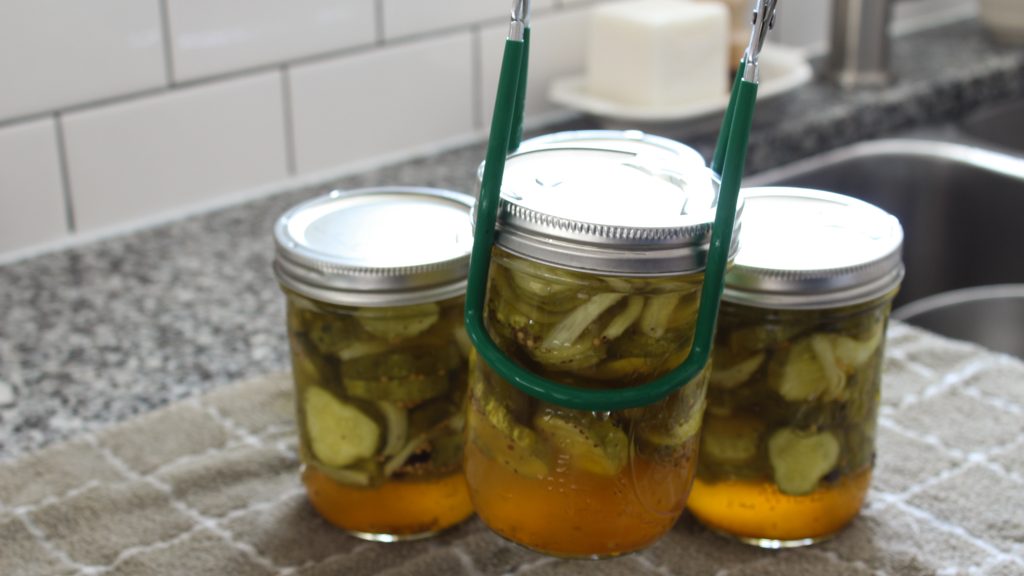
Step 4: Process the jars
To process the jars, place the jars in the simmering water bath canner, one at a time, using the jar lifter. The water must cover the jars by 1 inch — if it doesn’t, add boiling water to the canner. Now, place a lid on the canner and adjust the heat to medium-high. Allow the water to come back up to a rolling boil. Once boiling, start your timer and process the jars in the boiling water for 10 minutes.
Adjusting processing time for your elevation
When processing at altitudes above 1,000 feet above sea level, you must adjust your processing time to ensure safe canning. This is because the barometric pressure at higher elevations affects the temperature at which water boils. If you’re at an elevation higher than 1,000 feet above sea level, adjust your processing time according to the chart below.
| Altitude in feet | Increase processing time by |
|---|---|
| 1,001 to 3,000 | 5 minutes |
| 3,001 to 6,000 | 10 minutes |
| 6,001 to 8,000 | 15 minutes |
| 8,001 to 10,000 | 20 minutes |
For example, I am 2,600 feet above sea level. So, I need to add 5 minutes to the processing time for a total processing time of 15 minutes.
Cool jars, undisturbed
After processing the cans for the correct time for your altitude, turn off the heat, remove the lid from the canner, and let the boil stop. Finally, carefully remove the jars from the canner using the jar lifter and place them on a tea towel. Let them fully cool undisturbed for 12 hours.
Step 5: Test the seals
After 12 hours pass, test the seals on your jars by pressing the center of each lid to see if it is flat. Double-check your seals by removing the bands from the jars and holding each jar up by the edge of the lid for a few seconds. If the seal does not hold, store that jar in the refrigerator and eat the pickles within 4 weeks.
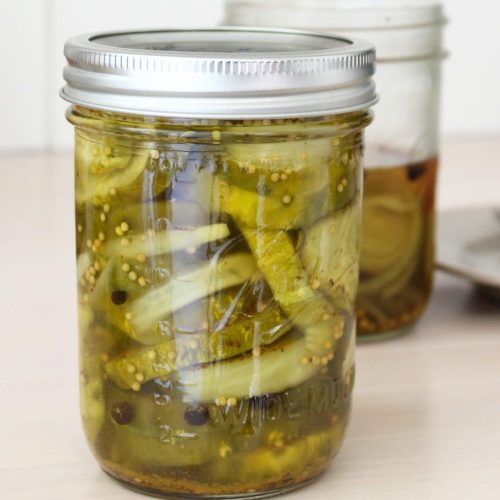
How to store your new bread and butter pickles
To store your delicious bread and butter pickles, first wipe your jars with a clean, damp cloth to remove any sticky residue from the canning process. Then, label each jar with the date and store them in a cool, dry, dark place. Your pickles should reach their full flavor within 4 weeks but can be kept for up to one year. When you do decide to open a jar of these sweet pickles, keep the jar in the fridge and consume the pickles within 6-8 weeks.
If you tried this recipe and loved it, I would appreciate it if you gave it 5 stars! Thank you xx

Old-Fashioned Bread and Butter Pickles
Ingredients
- ¼ cup canning salt
- 2½ lbs fresh pickling cucumbers
- 1 yellow onion
- 1½ cups white vinegar 5% acidity
- 1¼ cups apple cider vinegar
- 2¾ cups sugar
- 4 tsp mustard seed
- 1 tsp celery seed
- 1 tsp allspice berries
- ½ tsp turmeric powder
Instructions
Salt the cucumbers and onions
- Rinse cucumbers under cold running water and drain. Remove the ends of each cucumber, and cut into ¼ inch slices. Cut onion into thin slices. Place cucumbers and onions in a large bowl and mix.
- Sprinkle canning salt over the mixture and cover with a clean tea towel. Scatter ice over the tea towel, and let stand for 2½ hours.
Pre-heat jars
- 30 minutes before the cucumbers are ready, place jars on the rack of your water bath canner. Fill the canner with water, covering the jars by 2 inches. Bring water to 180℉, and simmer jars for at least 10 minutes. Leave jars simmering until ready to fill.
Fill the jars
- After 2½ hours, rinse cucumbers and onions under cold running water to remove salt, and allow to drain.
- Meanwhile, combine the white vinegar, apple cider vinegar, and sugar in a stockpot. Bring mixture to a boil, stirring until the sugar dissolves.
- While the pickling liquid comes to a boil, remove the jars from the canner and place them on your tea towel.
- Working quickly, add 1 tsp mustard seed, ¼ tsp celery seed, ¼ tsp allspice berries, and ⅛ tsp turmeric powder to each hot jar. Then, pack the cucumbers and onions into the jars, leaving ½ inch headspace.
- Pour or ladle the hot pickling liquid over the packed jar. Leave ½ inch headspace. Wipe the jar rims with a clean, damp cloth and center clean, new lids on the jars. Then, screw on the bands to fingertip-tight.
Process the jars
- Place the jars in the simmering water bath canner one at a time using the jar lifter. Water must cover the jars by 1 inch. Cover the canner and adjust the heat to medium-high to bring the water back up to a rolling boil. Allow the jars to process in the boiling water for 10 minutes, adding additional time for your altitude (see table above).
- After 10 minutes, turn off the heat, remove the cover, and let the boil stop.
- Carefully remove the jars from the canner and place on a towel. Let them fully cool undisturbed for 12 hours.
Testing the seals
- After 12 hours, test the seals by pressing the center of each lid to see if it is flat. Double-check your seals by removing the bands from the jars and holding each jar up by the edge of the lid for 5 seconds. If the seal does not hold, store that jar in the refrigerator and eat the pickles within 4 weeks.
- Wipe your jars with a clean, damp cloth to remove any sticky residue from the canning process. Label each jar with the date and store them in a cool, dry, dark place for up to one year.