
Simple Linen Cabinet Curtains for the Pantry
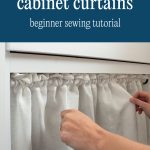

Don’t have doors on your lower cabinets? These simple cabinet curtains are a great solution for hiding plumbing and clutter. This beginner-friendly sewing project can be completed in under an hour — quickly adding softness and charm to shaker-style pantry cabinets.

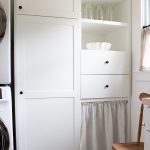
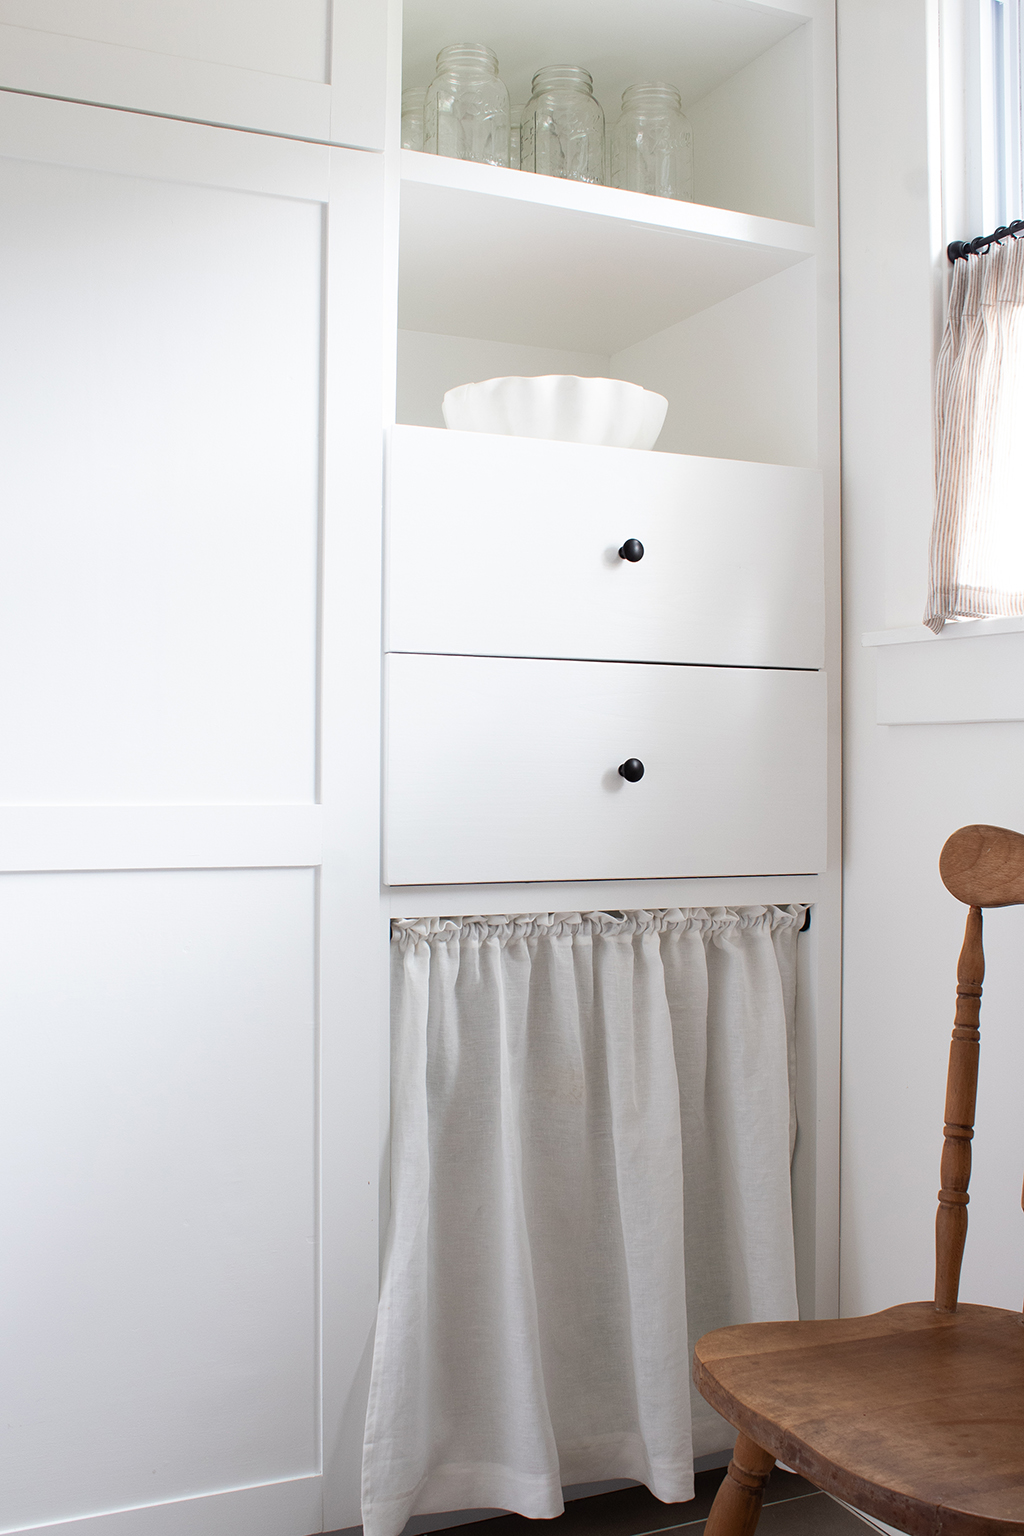
Rick built these lovely floor-to-ceiling white shaker cabinets for our pantry almost a year ago. Once they were all painted, we had planned to build desk that would connect the cabinet he built to the stock base cabinets along the wall.
Well, we still haven’t added the desk, and I’ve been staring at this empty hole for months. It was filled with clutter and was driving me crazy! Here’s a quick before — admittedly, after I had tidied everything I could:
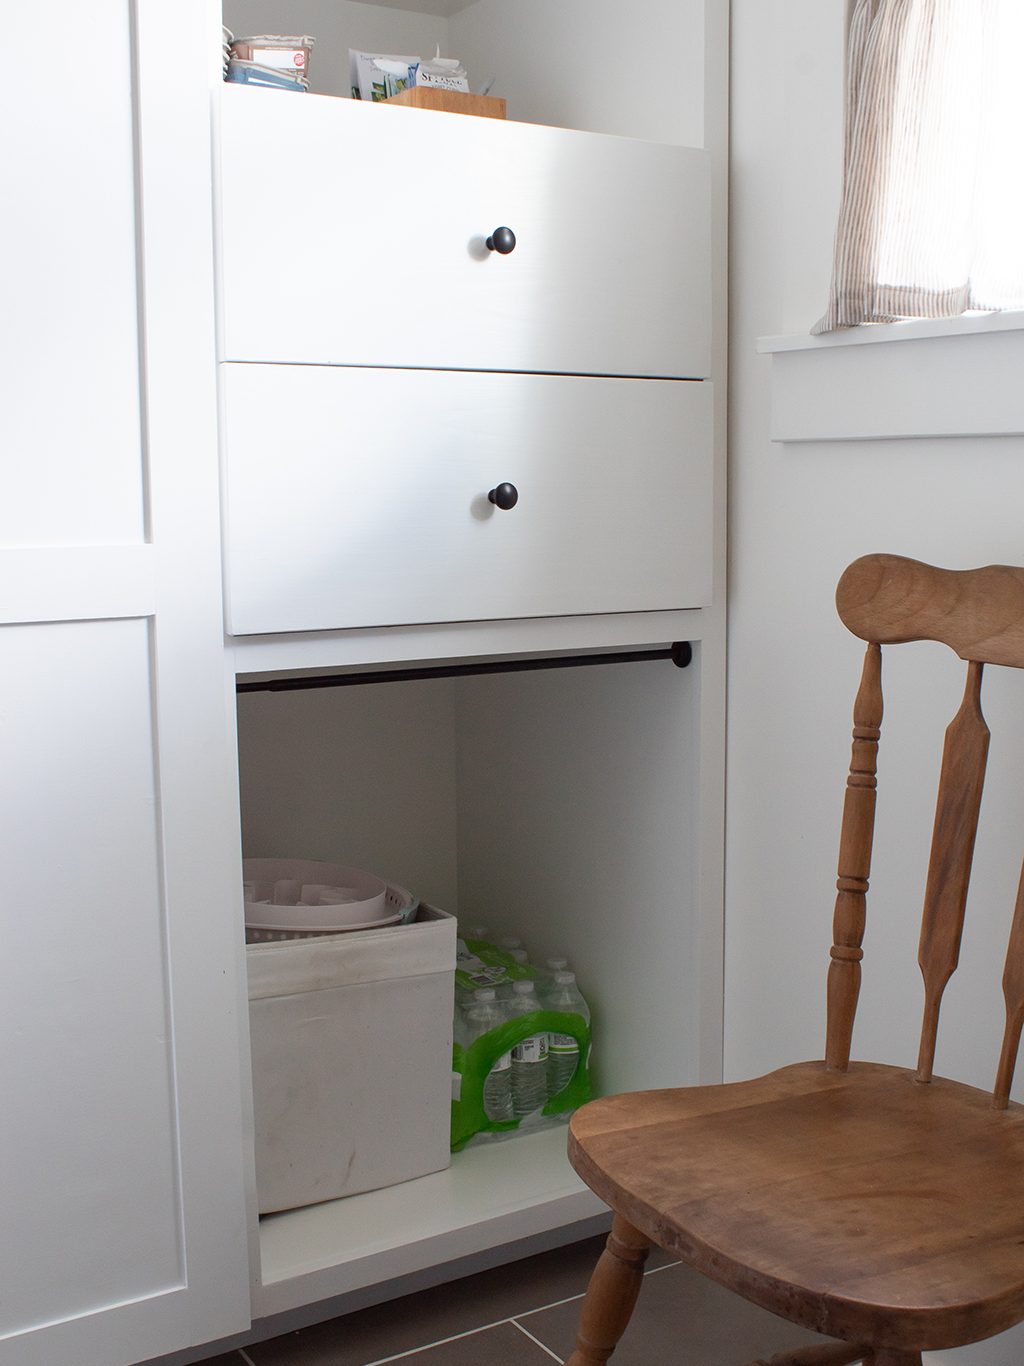
As I began to rack my brain for a way to hide the mess, sure enough, images of sink skirts and cabinet curtains started frequenting my Pinterest and Instagram feeds. Indeed, it appears skirted kitchen cabinets are making a comeback, and I’ve clearly caught the bug!
This simple linen curtain panel was a quick and easy sewing project — and the perfect solution for this little corner. It took me a little less than an hour and only required a yard of fabric. Better yet, this project came in at just $22!
You don’t need to be good at sewing or using a sewing machine to make these curtains. This is a beginner-friendly sewing project — if you can sew in a straight line, then you can make these charming pantry cabinet curtains!

What fabric should I use to make cabinet curtains and sink skirts?
First, you need to select your fabric. Because these curtain panels are gathered, you’ll need fabric that is at least two times wider than the cabinet opening you plan to cover.
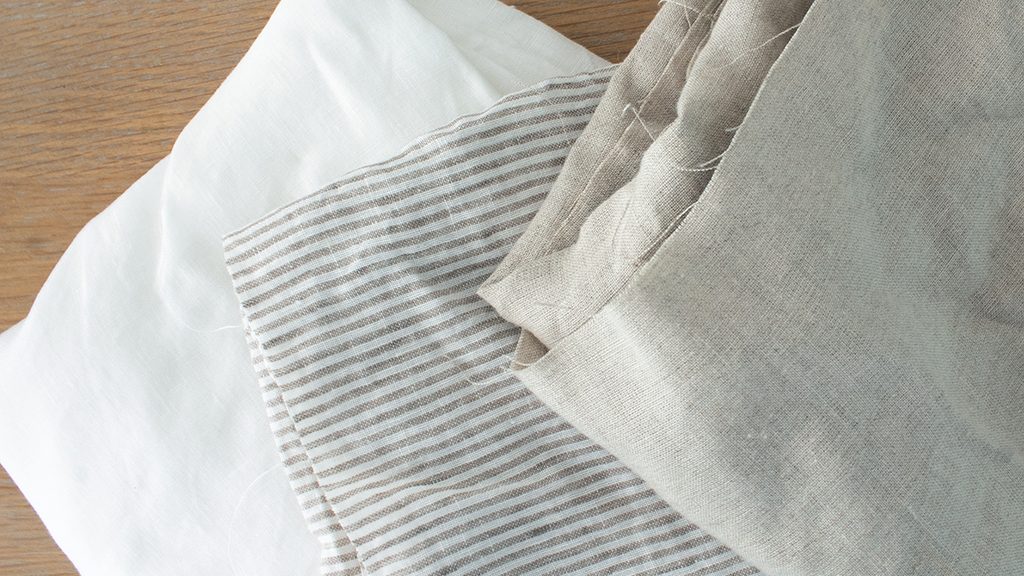
I opted for mid-weight linen for this project, but you could certainly use an old cotton bedsheet. I love linen because it gives a fuss-free look and hides a multitude of sins. I’d recommend something that you can easily wash at home and don’t need to take to the dry cleaners.
Want to add some color and pattern? You can make these cabinet curtains suit any style or color palette. I’ve seen some lovely patterned options — try a ticking stripe, ditzy floral, or even gingham patterned fabric.
Because I already have a striped cafe curtain in the pantry, I went with simple white linen. Plus, white blends in with the cabinets and doesn’t draw the eye to the unfinished project!
How should I hang cabinet curtains?
Before you start, you’ll also need to decide how you will hang the curtain. Your choice depends on how many openings you want to cover, as well as the look you want to achieve. If you have one or two cabinet openings to cover, you may want to try hanging the curtains inside of the cabinet, also known as an inside mount. But, if you have a large area to cover — and you want the look of a continuous curtain — mounting a curtain rod to the face of the furniture might be a better option.
One benefit to hanging your curtains on the face of your cabinets is that you can choose a standard curtain rod. However, I’m partial to an inside-mounted curtain because there are no holes to fill in if you decide to take them down in the future.
I’ve seen several inside-mount curtain rods on the market, like this one from Rejuvenation, but an inexpensive spring tension curtain rod also does the trick. You can get tension rods in many colors and metallic effects — even ones with nice finials (the piece on the end).
However you choose to hang your curtains, you’ll want to opt for a thin cafe curtain rod—usually 1/2 inch in diameter. If you are double-lining your curtains or you have a long distance to cover, you may want a 5/8 inch diameter curtain rod.
I decided to purchase this inexpensive black tension curtain rod from Amazon for this project.
What do you need to make cabinet curtains?
- Fabric: For these curtains, I chose mid-weight linen, but you could also use an old bedsheet. You’ll need fabric that is at least two times wider than the area you plan to cover.
- Coordinating thread
- Tension rod or curtain rod with mounting hardware
- Sewing machine
- Flexible measuring tape
- Fabric scissors
- Iron and ironing board
How to make simple cabinet curtains: step-by-step instructions
You don’t need to be good at sewing or using a sewing machine to make these simple cabinet curtains. This is a beginner-friendly sewing project — if you can sew in a straight line, then you can make these charming pantry cabinet curtains! I’ll walk you through this project step by step.
Before you start: Prep your fabric
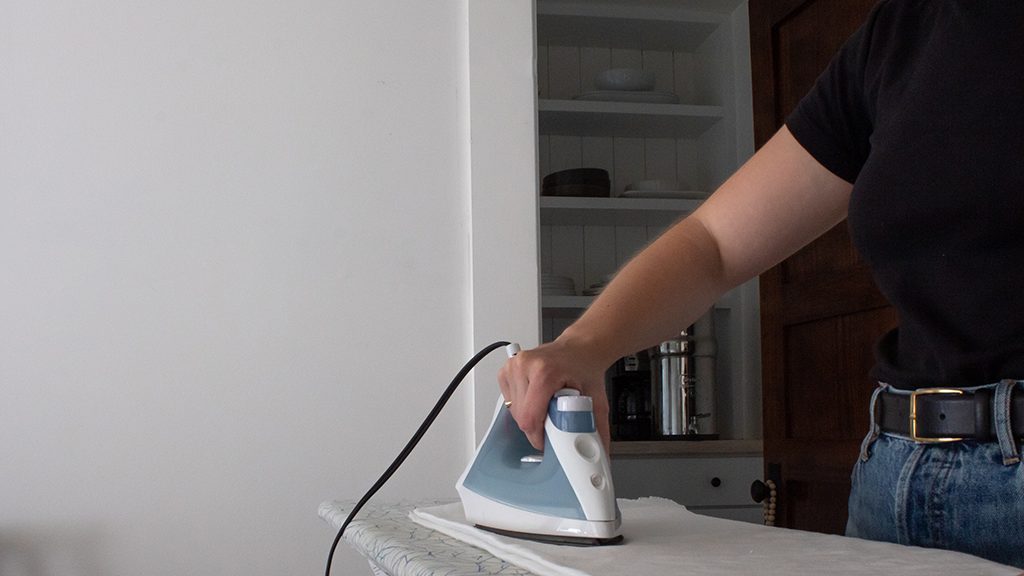
Before you start sewing, you’ll want to wash and dry your fabric. This pre-shrinks your fabric and prevents your curtain panels from shrinking when you decide to wash them later. If you’re using linen, I would recommend drying the fabric until about 80% dry and then ironing it flat. Ironing your fabric makes it easier to get an accurate measurement later down the line. And, before you say it — I did iron mine! I just didn’t fold it very well.
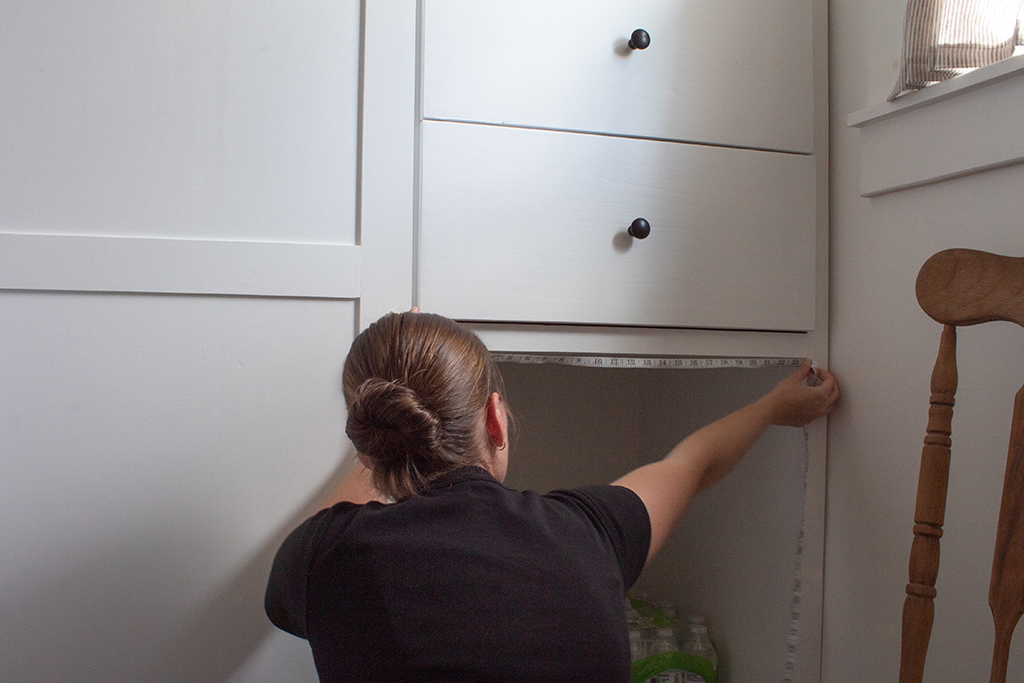
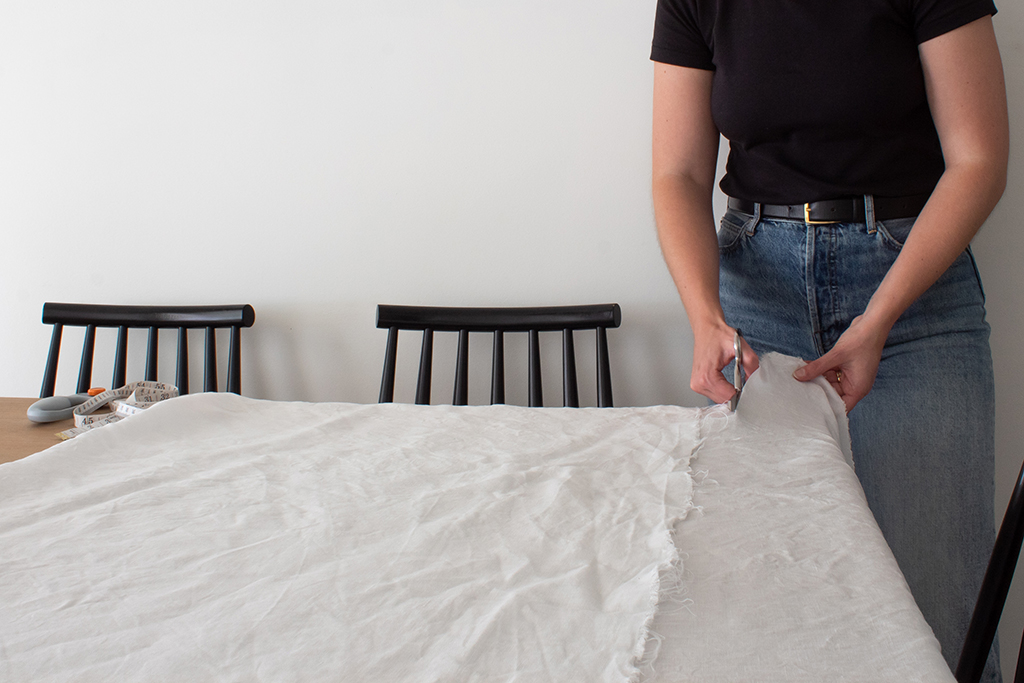
Step 1: Cut your fabric to width
First, measure the width of your cabinet opening and double it to determine the width of your fabric. Then, cut your fabric to this measurement. I like to measure out the actual width and then fold the fabric back on itself to make doubling the width really easy.
My cabinet is 24 inches wide, which means I need a fabric width of 48 inches. I measured 24 inches across my fabric and then folded it back on itself to create a panel that was 48 inches wide.
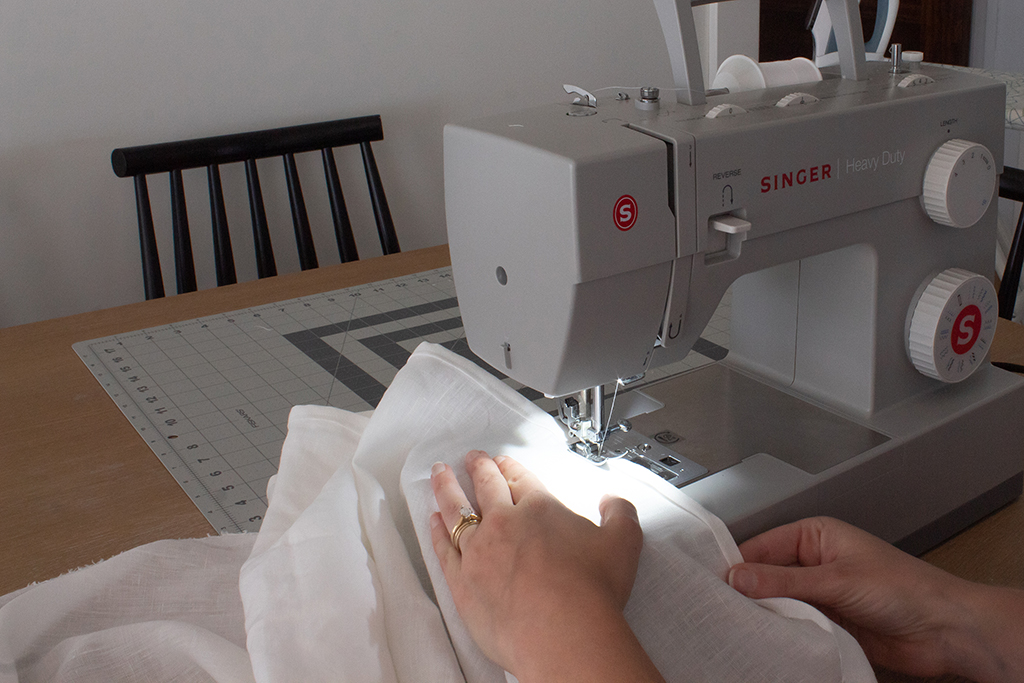
Step 2: Sew the sides of the curtain
Next, you will sew the sides of the curtain to create a clean edge. To do this, simply fold in a 1/4 inch seam allowance on each edge, making sure to turn it onto the wrong side of the fabric. Repeat this 1/4 inch fold to close in the frayed edge. You can always press this double fold to make sewing easier. You’ll see that I don’t — I simply finger-press it so that it keeps its shape as I push it through the sewing machine.
Then, sew this fold down using a straight stitch. Remember to backstitch at the beginning and end to secure your work. Repeat this process on the other side of your curtain panel.
Step 3: Sew the top of your curtain panel
To create a clean edge for the top of your curtain panel, fold in a 1/4 inch seam allowance at the top. Sew this fold down using a straight stitch. In this case, the frayed edge will be hidden inside the header, so we do not need to double fold it.
Step 4: Sewing the ruffle and casing
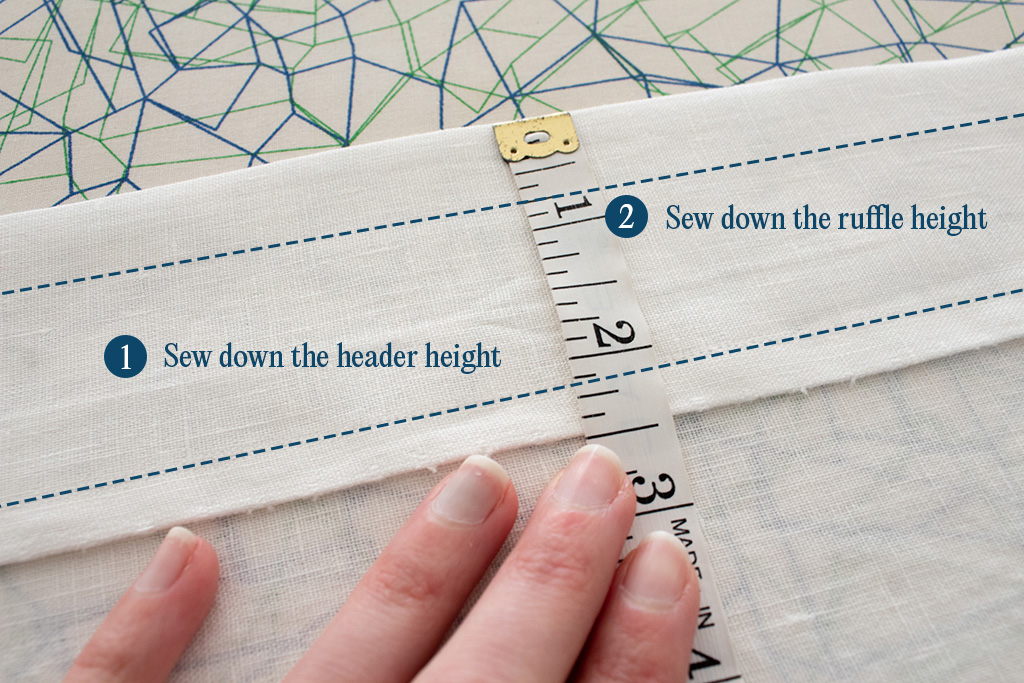
Now, we will create the ruffle and casing for the curtain rod to go through. Together, these elements will create the header.
Determining your header height
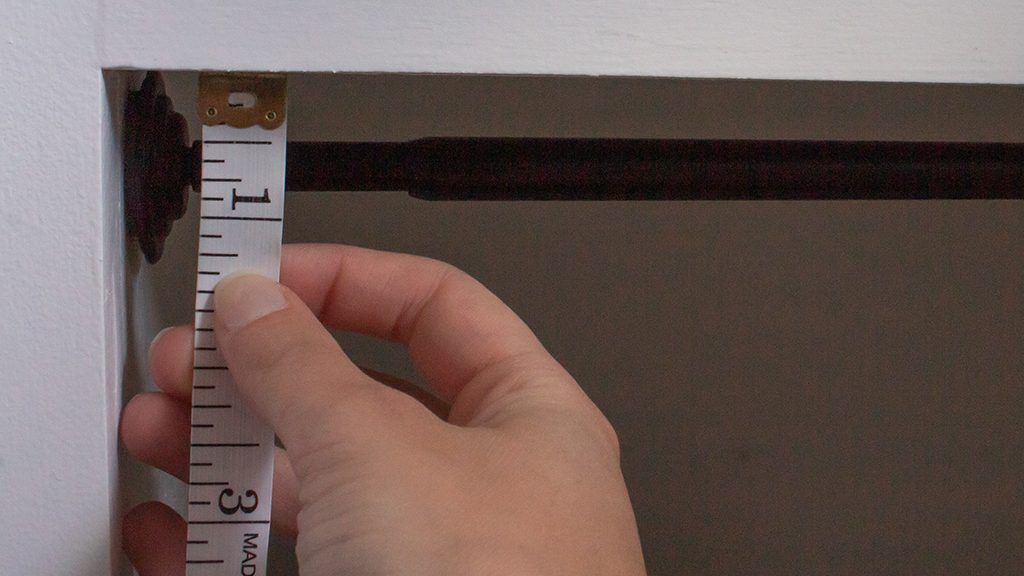
To begin, measure the distance between the top of the cabinet opening and the top of the curtain rod. This measurement will be your “ruffle height”.
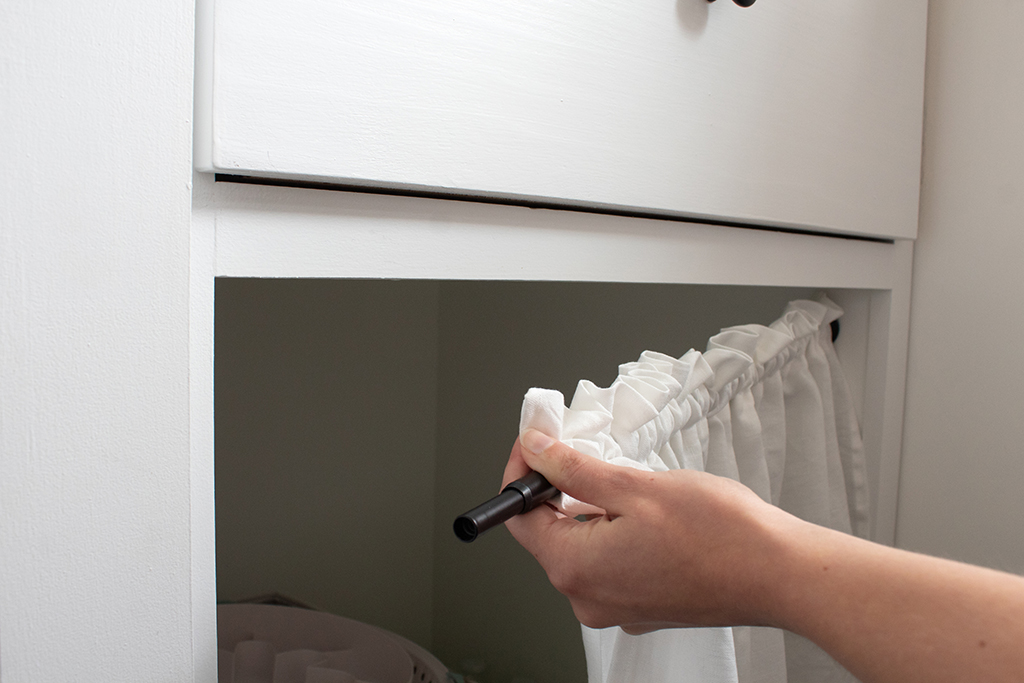
It’s a little hard to tell in the image below, but my distance was initially a 1/2 inch. I wasn’t happy with the placement of the tension curtain rod, so I moved it down to 3/4 inch. This will be easier if you’ve already attached the curtain rod to the cabinet.
Note: If you are hanging these curtains on the face of your cabinet, you will want to drape your fabric over the curtain rod and play with it until you find a ruffle height that you like.
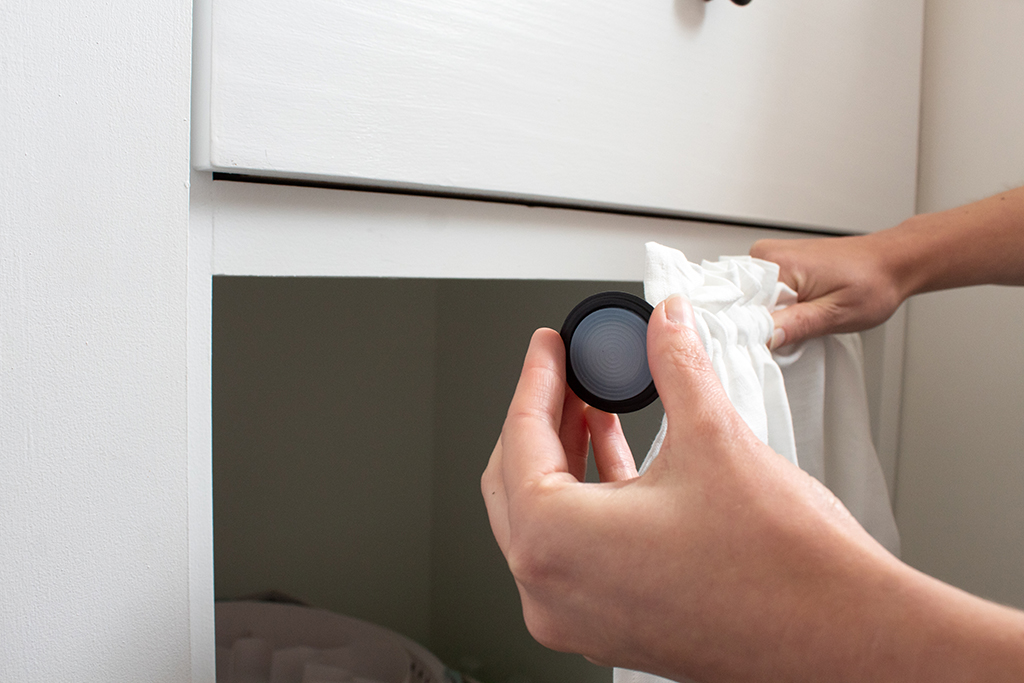
Then, measure the circumference of the curtain rod with your measuring tape. If you have a 1/2 inch diameter curtain rod, your circumference is 1 and 1/2 inches. If you’re using a 5/8 inch rod, your circumference is 2 inches.
Finally, add these numbers together with the seam allowance to get the total header height. For me, that was 3/4 inch + 1-1/2 inches + 1/4 inch, which equals 2 and 1/2 inches.
Total header height = ruffle height + circumference of curtain rod + seam allowance
Sewing it all down
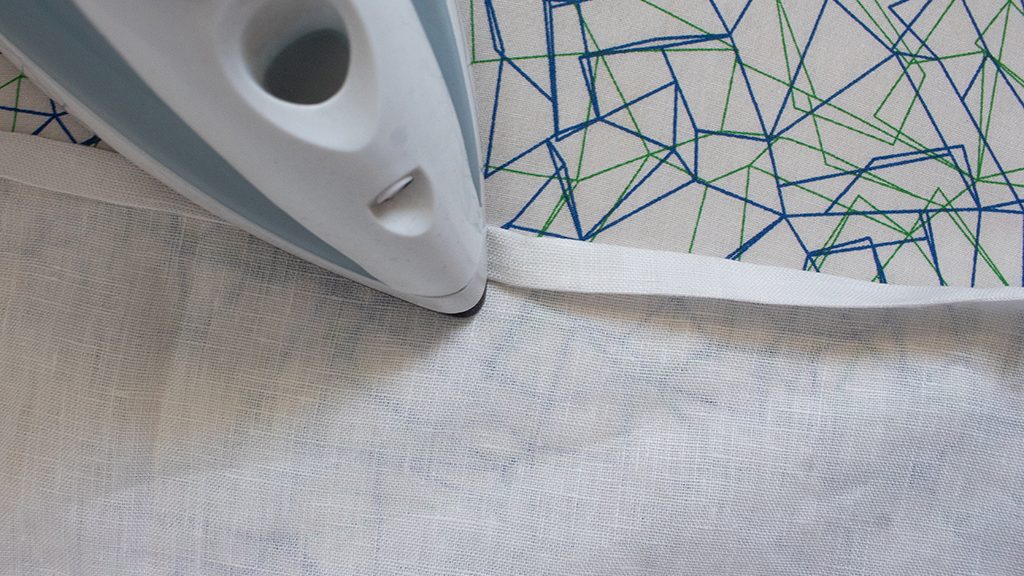
To sew the header, first fold the top edge of your curtain panel down to meet the measurement you determined in the previous step. Then, press it flat all the way across to form a crisp edge.
Now, return to your sewing machine and sew down the header. I just sewed along the 1/4 inch seam allowance we created in step 3. This created a total header height of 2 and 1/2 inches.
Then, sew a straight stitch along the top of the header to create your ruffle. In my case, I sewed a straight line 3/4 inches from the top of the header to create my determined ruffle height of 3/4 inch.
Step 5: Hemming your curtain
Guess what? You’re almost done — it’s now time to try your curtain on for size!
Hang your curtain on your curtain rod and determine where you would like the curtain to end. I wanted the curtain to land just below the cabinet opening, but you may want your curtains to touch the floor or even pool on the floor.
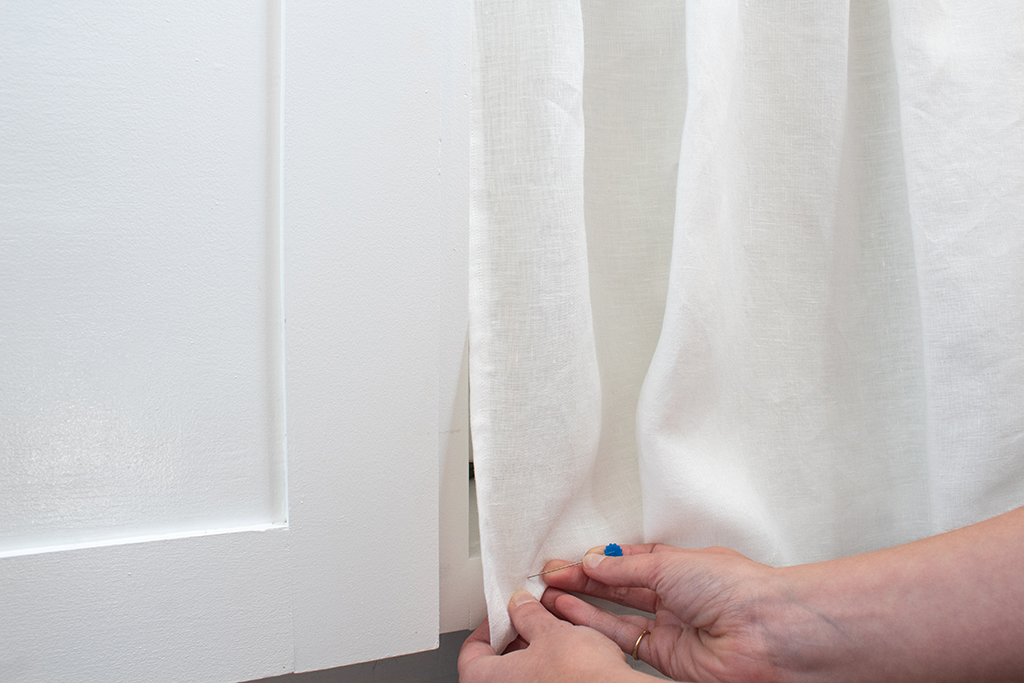
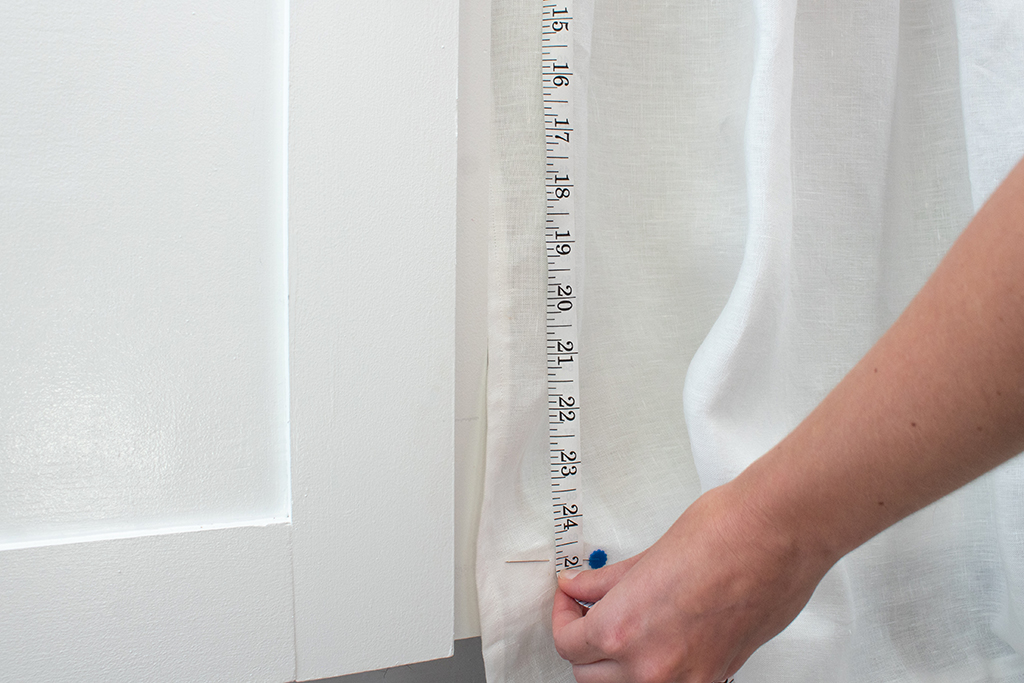
Mark your desired length with a pin, and then remove your curtain. Then, measure the distance from the top of your panel to the pin with your tape measure, and note this number. My curtain panel needed to be 25 inches long.
At this point, your curtain may be a bit wrinkled — be sure to iron it so you get a precise hem.
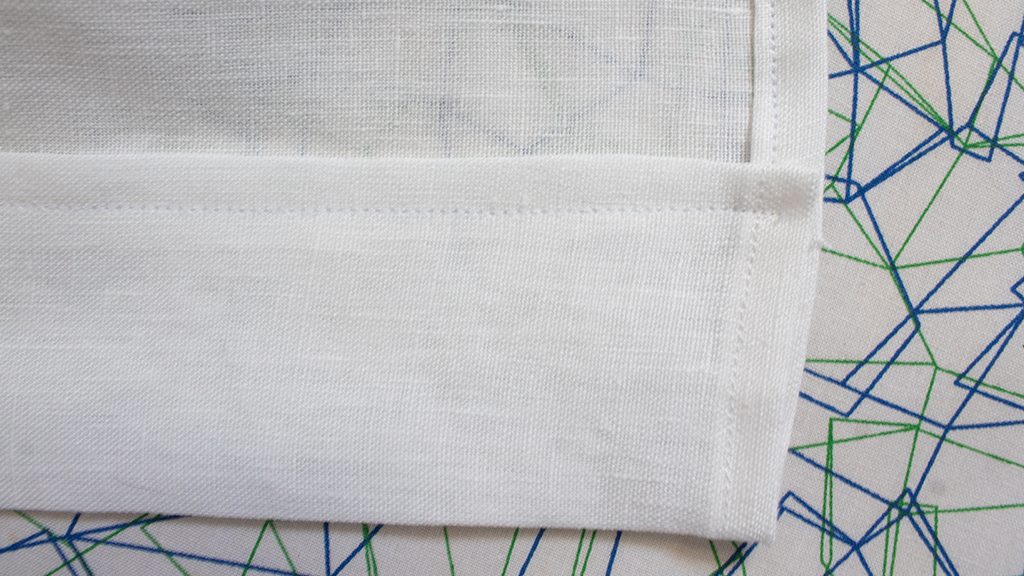
Adding a footer to your curtain
To create a neat footer and echo the same finish as on my cafe curtain, I decided to add a 2 inch thick footer to the panel. This means that I needed to add 4 inches to the total length, plus a 1/4 inch seam allowance to hide the frayed edge.
To do this, I measured 29 and 1/4 inches from the top of the panel and then cut the panel at this mark. To make cutting the panel easier, I like to fold and line up my curtain length-wise and then cut straight across the bottom.
Then, I folded in the 1/4 inch seam allowance, pressed it flat, and then folded the bottom edge up to form the 2 inch footer. I pressed the entire thing to create a crisp edge. To secure the footer down, I sewed along the seam allowance with a straight stitch, making sure to backstitch at the beginning and end to secure my work.
For a simple curtain hem
If you don’t want to add a footer, simply add a 1/2 inch to your desired length to accommodate your hem. To create a neat hem, simply fold in a 1/4 inch seam allowance along the bottom, making sure to turn it onto the wrong side of the fabric. Repeat this 1/4 inch fold to close in the frayed edge, and press this double fold flat.
Finally, sew a straight stitch along the bottom to create the hem and finish your piece.
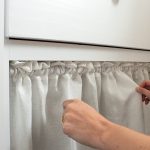
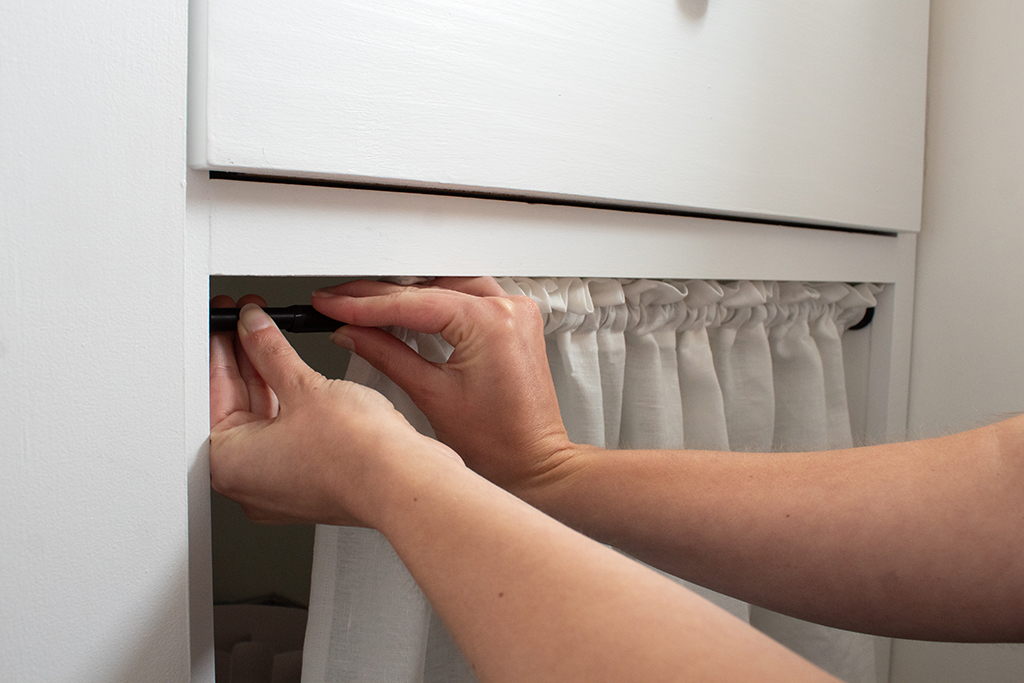
Step 6: Hang your DIY cabinet curtains
Violà! You’ve got a beautiful DIY curtain panel! Now, all you have to do is hang your cabinet curtains.
I simply slid my curtains back onto my tension curtain rod, reattached the finial, and tightened the rod until it held in place. I’d recommend moving the fabric along the rod until it fills out and everything is equally gathered.
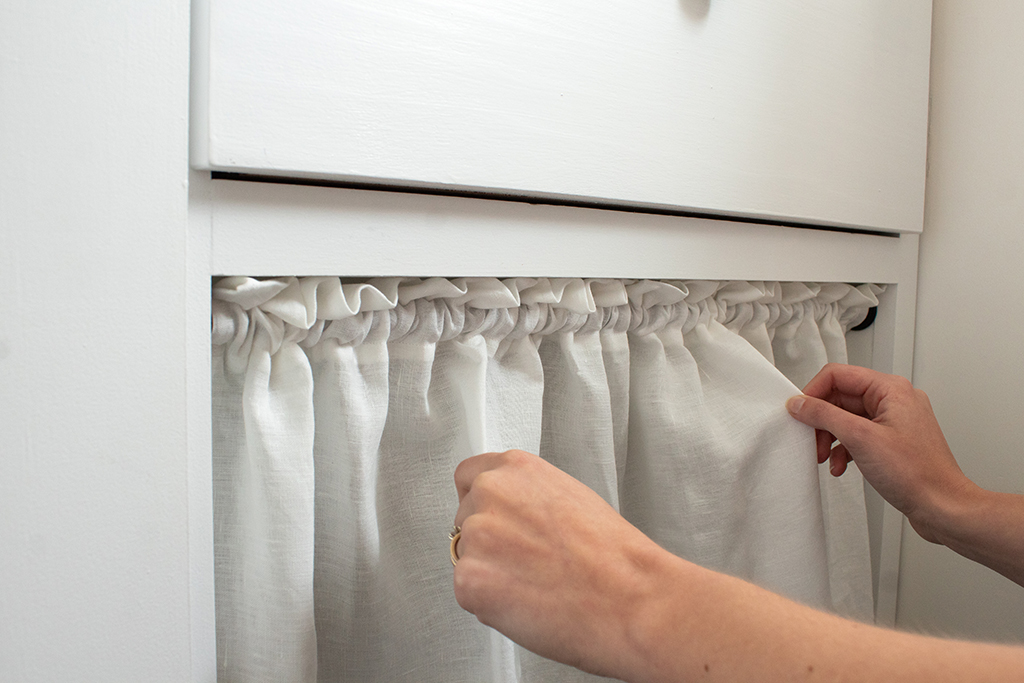
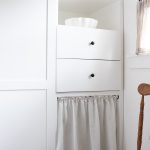
The final look
I just love the way this cabinet curtain turned out! It’s simple and really tidies up this little corner. And, I no longer feel the need to rush and put in that desk top — which is good because life is too busy right now.
Let me know what you think! Are cabinet curtains and sink skirts back in? What fabric would you use? Please leave me a comment below!
Don’t forget to pin this for later!
